Here ye, here ye, the first Project Pinterest post has now gone live! I'm excited to start this series on the blog. The purpose of these posts is so you guys can see that anyone can do the projects on Pinterest, no matter how intimidating or daunting. It probably won't turn out exactly like the picture, and you'll probably make mistakes, but that's okay.
And I know you probably don't want to hear that, 'cause I never want to when I'm doing a project. I'm such a perfectionist that if I can't guarantee that my project will look exactly like the picture, I likely won't even begin. But I've decided to push myself to make things that I've always wanted to make, things that I've repinned a dozen times, though mistakes and trials will come. Okay, okay, that was a little over-dramatic, but I think you get the idea.
I'm also doing these posts to encourage you guys, especially if you're a lot like me in crafting situations. I'll likely be using things that I already have around the house instead of the brand new supplies the tutorial recommends, making the project look kinda hodge-podge and kitschy. And if you want to make these projects, I hope me making a mess of my attempts will help you give yourself permission to mess up and go with what you've got. Okay, enough rambling, let's get on with it!
Here is the tutorial I found on Pinterest that I used to get me started: http://www.theidearoom.net/tissue-paper-pom-poms-tutorial/
What I Used:
-Glittery and Plain Tissue Paper (left over from wrapping)
-Yarn (left over from previous projects)
-Scotch Tape
-Packing Tape
-Scissors
-Ruler
What I Ended Up Doing:
1. The tutorial said to stack 15 sheets of tissue paper, but I only had 12 of the glittery kind, so that's what I used. I didn't find out until I did my next two that the tutorial had an odd number of sheets for a reason, which is to make the shape fuller looking. So, for my next two, I used 9 sheets of tissue paper.
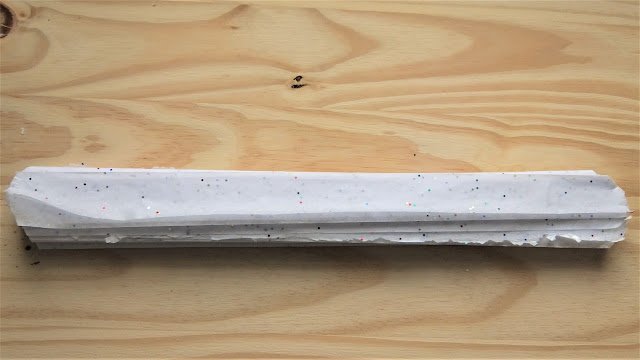
2. Next, it said to fold the tissue paper accordion style with 1-2 inch folds. I did 1 inch-ish folds and they were no where even, but it all worked out in the end, so...
3. Then, I cut the ends as a scalloped edge, which basically means a half circle. This was actually kind of difficult because my accordion was pretty thick, so that's why I used less tissue paper in my subsequent pom poms. I also used a triangle cut on my next two because it was easier to get it proportionate on each side.
4. Now, this is where I deviated from the tutorial quite a bit. The tutorial advised using a wire twist tie to cinch the middle and to create a loop for hanging. I didn't have those, and I figured that tissue paper is really light and not heavy duty, so I just used yarn. I also remembered from another tutorial I skimmed through to cut short slits on each side of the halfway mark of the accordion stack that you can wrap the yarn around, providing the security you could get from the wire twist tie.
5. Now is when you start fluffing each side, one side at a time. All I would advise at this step is to go slowly and carefully so as not to rip the paper. Also, alternate pulling tissue paper from the front and the back of the side you're working on; it makes the pom pom fluffier.
6. And now you're basically done. All you have to do is figure out where you want to hang you're pom poms, how far down you want them to hang, and what you want to hang them with. I hung mine over my reading chair and I just used packing tape to secure them to the ceiling. I would have used a command strip, but since I have popcorn ceilings, it wouldn't have stuck. Plus, the pom poms aren't heavy at all, so your probably just need some tape anyhow.
Okay, now you're done! I hope you guys enjoyed my super honest approach to a tutorial. If you guys try making them, tag me on Instagram or Twitter (linked here and on the side); I'd really like to see what your guys's unique creations look like. And if you guys want to get an idea of what I'm thinking for the next Project Pinterest, you can follow me over on Pinterest; I'm Fly a Kite on there as well.
I hope that this tutorial inspired you guys to just go on and get crafting, no matter if it turns "Pinterest Perfect" or not. Happy crafting!
k, bye.


0 comments:
Post a Comment