Thursday, September 22, 2016

Floor Pillows

I know it has been a while and a half since I have posted. Over the past two weeks, life has chewed me up, swallowed me, regurgitated me, and hit me over the head with a sledgehammer. That's a long winded way of saying I'm sorry for not being more active, but I promise I will definitely be more regularly active from here on out. I really enjoy writing these for you guys, and I appreciate the support.


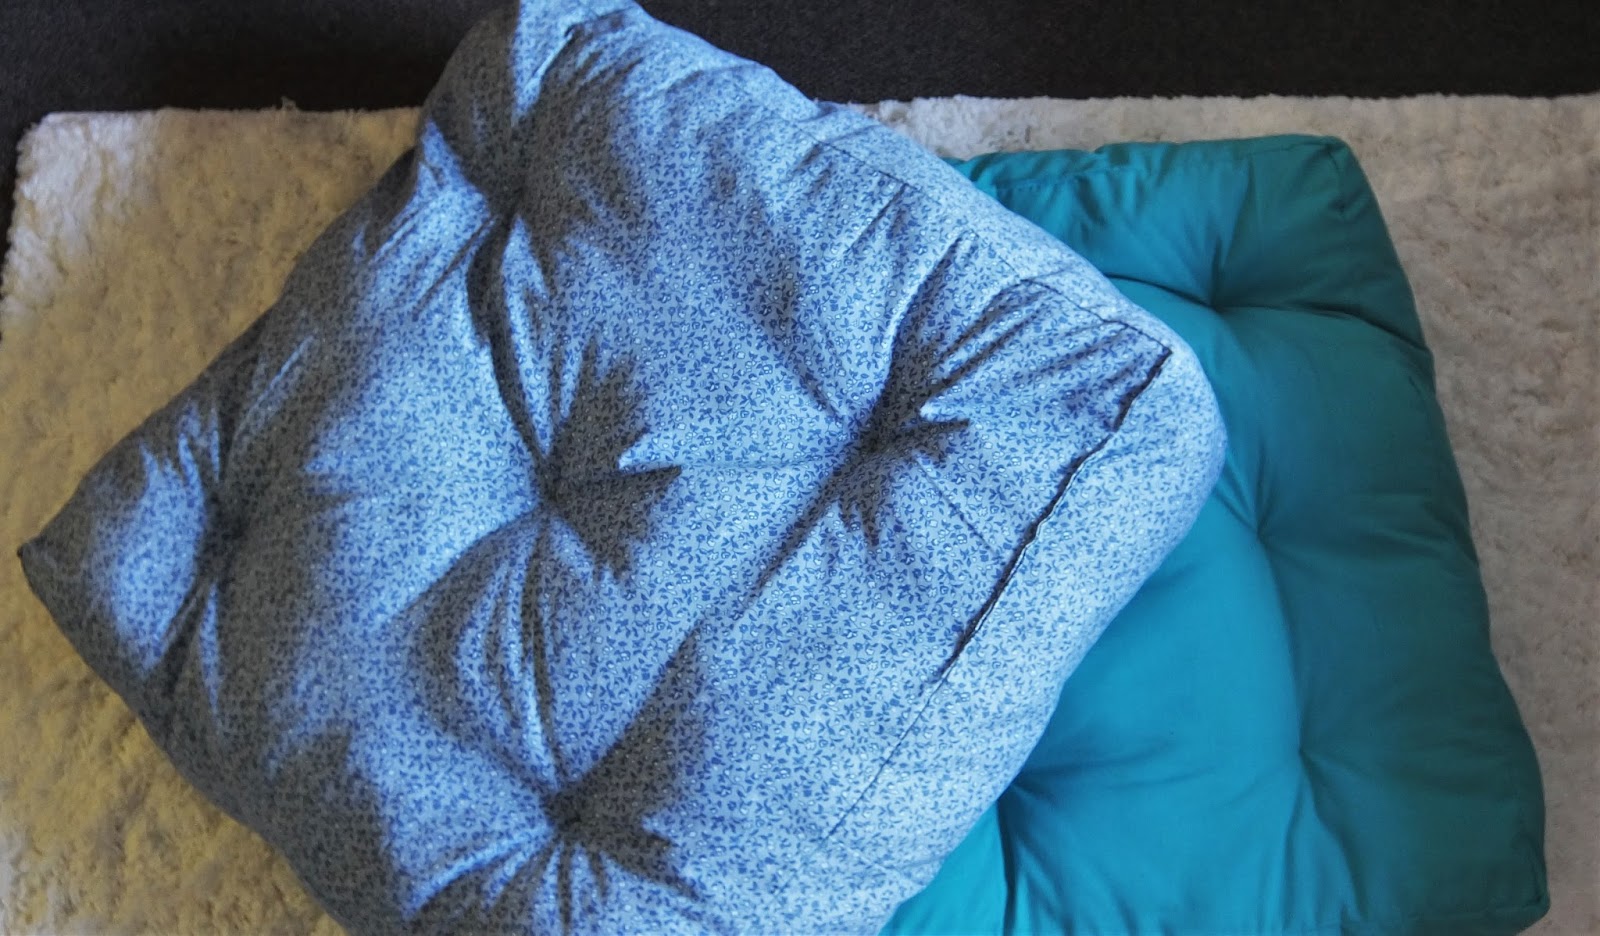
Anyways, I wanted to share these comfy and cute floor pillows I made with you. These are perfect for adding extra seating in a social space without having to buy actual chairs and furniture. These were super cheap for me to make because I used fabric, sewing supplies, and stuffing that my mom already had, and I only had to buy two extra bags of stuffing.

I don't have any pictures of the making process, so I'm just going to have to give you written directions.

First off, here is the list of materials:
1. Fabric (at least 3 yards-ish, and not too thick)
2. Thread
3. Sewing Machine and/or Sewing Needle
4. Sewing Pins
5. Fabric Scissors
6. Long Upholstery Needle
7. Upholstery Thread
8. Ruler
9. Chalk


Okay, first step is to measure your fabric. You'll want to measure two 30"x 30" squares. You can do this by using the chalk to draw your lines. After you measure the squares, cut them using sewing scissors. 

Next, you will want to measure a very long strip with dimensions of 122" x 9" (the extra 2" in the 122" is for sewing, and just in case you make a mistake. Lord knows I made quite a few). If you want to make your floor pillows thicker and gushier, you can make this strip wider than 9". Once that's all cut out, you are ready to start pinning. 


You will want to start pinning one side of one of the squares to the long side panel strip, wrong sides together. After you finish the first side, you are 25% there! Finish pinning all four sides of the square to the side panel, and you are ready to start sewing.

When sewing, use a straight stitch. I'm not going to instruct you on proper machine settings or anything like that because every machine is different. Plus, I'm in a love-hate relationship with mine, so I'm not the best person to help you guys get along with your sewing machines.


Once you finish sewing the first square to the side panel, do the same exact steps for the other square (pin wrong sides together, sew). When you're sewing this square, make sure to leave about 5" to 10" unsewn so that you can stuff it. I did one pillow leaving the extra space in the middle of a side and the other one on the end of a side. Both worked fine, so it's up to you where you have the unsewn space.

After everything is sewn together, turn the soon-to-be pillow inside out and start stuffing. I didn't stuff mine nearly as much as I should have, so when you are stuffing, if you think you have enough, add more. 

When completed with the stuffing, sew up your open space. You can either do this by hand, or have someone hold the pillow while you sew that space shut using your sewing machine. 


With this step completed, you're nearly there. Last step is to use the long upholstery needle and thread to create the cute little indent thingys in the pillow that make it look all pudgy and cute. 

What you need to do is thread the upholstery needle, using a generous amount of upholstery thread. Then, stick the needle in the pillow on one side where ever you want- I tried to do a 3x3 configuration. 

Once the needle is through on the other side, bring it back to the first side, cut the thread, and tie a knot as tight as you can. Do this for as many indents as you want (goodness, what are they actually called, though).


And now you are done! You created extra seating for probably around $20 (unless you didn't already own a sewing machine, then hopefully it'll pay for itself in the long run). I hope you guys recreate this project and have at least some fun doing it. I had about 60% fun and 40% frustration and anger. But it was all worth it in the end. 

If you do make these, I would love to see them. Tweet me pictures of your beautiful creations @fly__a__kite. 

Wow, I sounded so millennial and like such a blogger. Felt a little weird, to be honest, but the sentiment still stands. Anyways.

k, bye.


Thursday, September 1, 2016

Art Wall Inspiration


It's September! Once it's September, it begins to feel like it's actually fall, even though for a lot of people the weather does not reflect that mentality (AKA, it's probably still 80 degrees and freakin' humid). Anyways, it's a new month, which means the ambitious To Do lists are created, filled with projects we think, "yeah, I can get this done in 30 days." Well, I have a project that you can add to that list: an art wall.

For about a month, I have been collecting randoms bits from my clutter and buying cute wall decor from the shops in order to make my art wall idea come to fruition. I wanted to share my art wall with you so that (hopefully) you would be inspired to create your own.

DISCLAIMER: Now, I know that when I click on posts like this, I usually do not create the project because I want it to look exactly like the pictures. If you are like me in this way, I totally understand. However, I would still like to encourage you to try to make an art wall if you really want one, even if it doesn't look like everyone else's. Trust me, I know it's hard getting over wanting it to be perfect. But, if you make it personal to you, that's the best sort of project to create.

Anyways, on with the art wall inspo!


I got the mirrors from a discount store in town for only $5! They're pretty cheap, but they look cute, and no one can really tell their value from up on a wall anyhow. 


The verse on the left is actually the front of a gift bag that was only 50 cents. I just cut the verse from the bag, leaving the handle on that side intact, and then I hung the verse by the handle and used some tape on the back to keep it in place. 


The Toms banner is the one you get in the box when you but the shoes. I hung it up using hair ties because I forgot cute string. As for the bunting, I made that using twine (I think from the dollar store), and I made the flags from the bags that sheets come in when you first buy them (these in particular, the Shabby Chic sheets from Target). 


The hanging bobble lights are ones on clearance from Target. You know the magic clearance end caps at Target? I found these happenstance on one of those and they were only $5. Probably because they are tinted blue, but I like blue, so it's ok.


The fan is a Chinese fan that was a present from my best friend in third grade. I'm so glad I still have this; it brings back some great memories.


The cross up at the top is a present from a new but wonderful friend. It has that verse from Psalms that starts with "be still." It's a good one, that one.


And last but not least is the beautiful wreath in the middle. I made this last year from some materials in my mom's craft room. I used a metal ring wreath frame and some fake flowers that have most likely been in their box since before I existed. I stuck the flowers on with green florists tape and voila! The cute chalkboard sign in the center is from Target Dollar Spot, and I just thought "Hello!" was cute and appropriate. 

Well, that is all that is on my wall (hehe, I made a rhyme). I hope that you guys like it and that it gives you inspiration and hope for your own art wall. Pretty much everything on my wall is personal and my own. If I can make a decent looking art wall with craft room leftovers and bargain buys, you can totally do it. I mean, I hung my Toms sign up with hair ties! Anyways, good luck to you in your arty endeavors.

k, bye.